Text Labels
Text labels let the host add readable notes right on the table — section headings, zone names, reminders, or a callout pinned to a specific component.
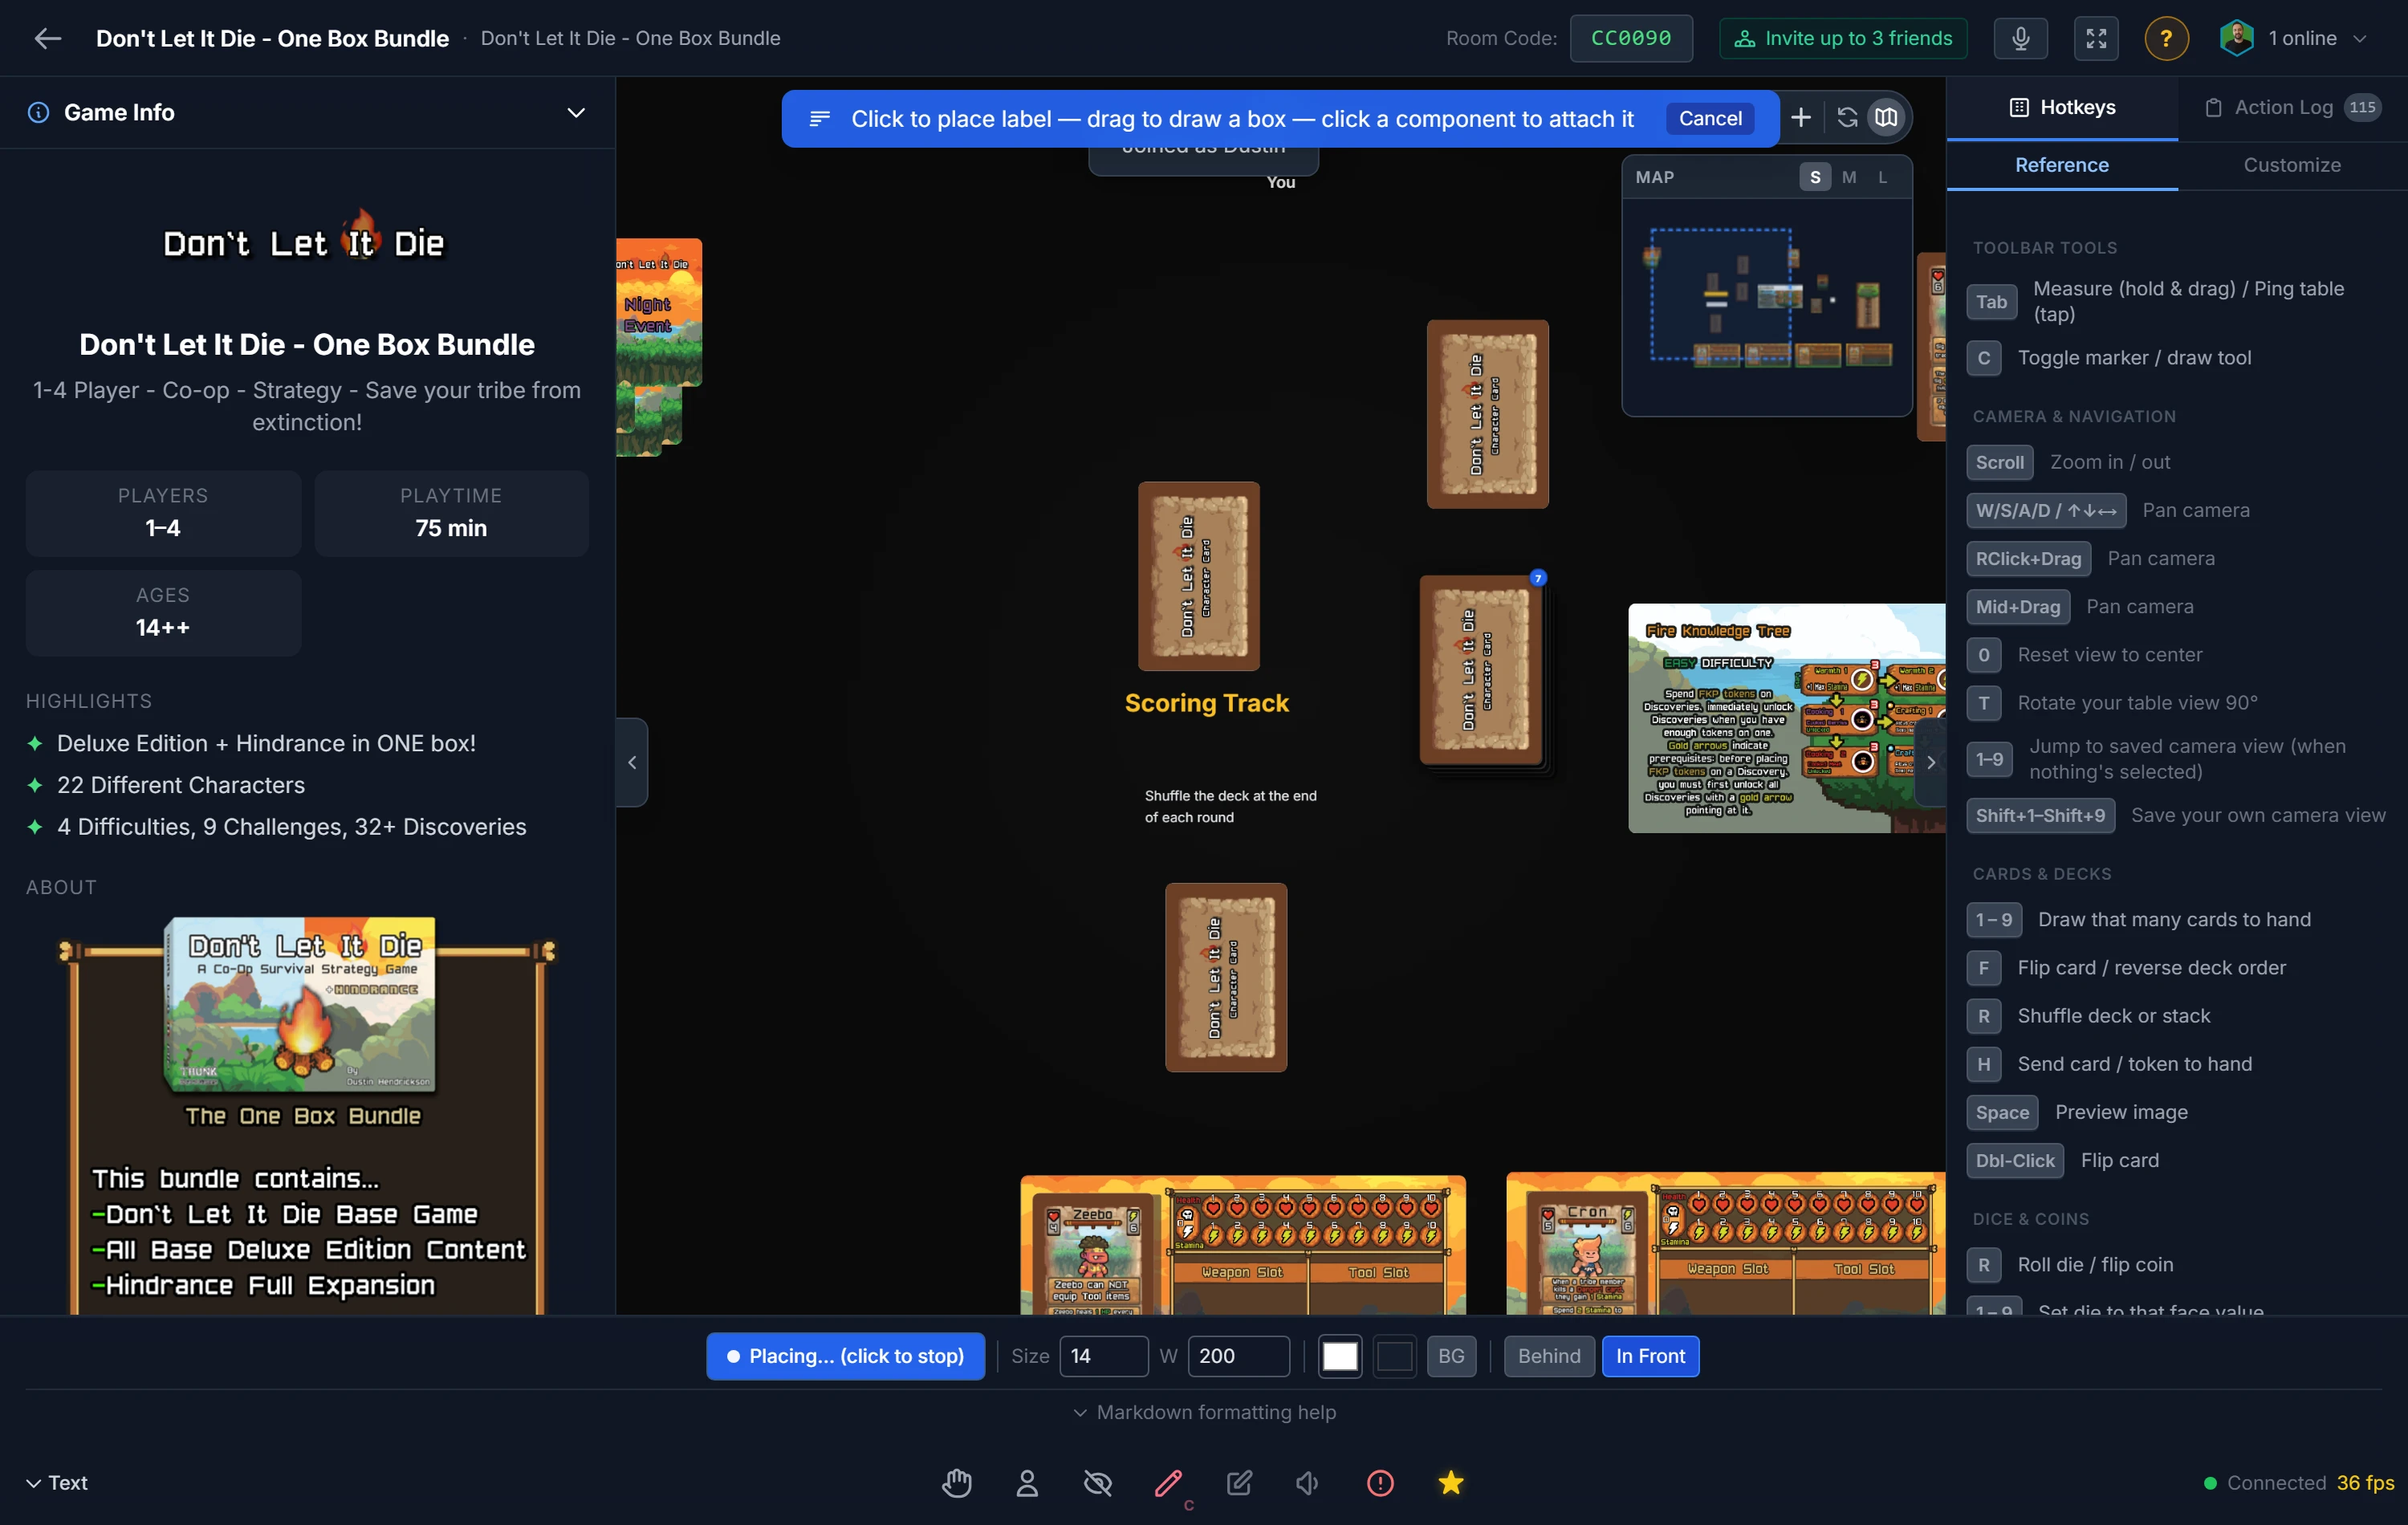
Placing a label
- Open the Text Labels tool from the bottom toolbar (or press its shortcut — it's shown on the button and in the in-room Hotkeys panel).
- Click Place Label, then:
- Click an empty spot on the table to drop a label there,
- Drag to draw a box — the label wraps to that width, or
- Click a component to attach the label to it, so the label moves, rotates, and travels with that piece.
- Type your text.
Formatting
Before placing — or for the selected label(s) — you can set:
- Size — font size in pixels (8–72).
- W — the maximum width of the text box in pixels (60–800); text wraps within it.
- Text color, plus an optional background (toggle BG on or off and pick its color).
- Layer — draw the label behind or in front of pieces.
Editing & removing
- Select a label to edit its text and formatting; the toolbar shows "Editing selected". You can select several labels at once to restyle them together.
- Drag a label to move it — attached labels move with their component.
- Delete a label like any object: select it, then remove it from the right-click menu.
Text Labels are a host tool, and everyone at the table sees the labels you place.